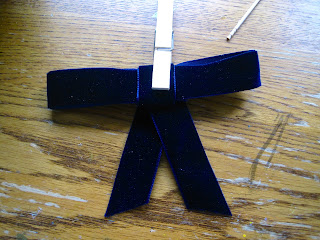
On the way home from the zoo on Friday, we managed to swing by my mom's favorite fabric store, where I found the most luscious velvet ribbon ever, in the most lovely colors.
Inspired by all the bow-love shown over at A Beautiful Mess, I decided that I'd make a floppy bow headband with a precious length of it.
Here's how it happened:
 |
| Materials Needed: About a yard and a half of ribbon, some clothes pins, the best tube of E-6000 Adhesive, an old plastic headband, and a pair of fairly sharp scissors. |
1. Over a fairly-covered surface, spread a little bit of E-6000 over a couple inches of the headband. You may have to find something to spread it evenly a few seconds after it's applied.
2. Stick the ribbon to the glued headband, clothespin it to keep it from sliding around, and then continue up the rest of the headband a few inches at a time.
3. Snip the ribbon that's left, and set the whole thing aside to dry.
4. Meanwhile, make an infinity loop (or a jacket fold, as they told us in elementary school) with a shorter length of ribbon, and glue the ends to the middle. Clip that too, and let it dry.
5. Once the loop has dried, put a dot of glue in the very center. Cut a very short (I used three times the width of the loop) piece to wrap around the center of the loop.
6. Glue down any loose ends.
7. Add any "tails" that you'd like, and clip the center for drying.
8. Glue your bow to the headband in whatever position you wish, and (for the millionth time) let it dry.
And... Ta-da!
A cute little headband for just throwing on. I made mine blue to match a cute little sweater, but I can imagine it in tons of colors. :) I can't wait to wear it.
Happy Crafting!
-Riley


No comments:
Post a Comment